 Jonathan Stoker
Feb 03, 2024, 04:50am
2,841 views
Jonathan Stoker
Feb 03, 2024, 04:50am
2,841 views
Adding SeatGeek Tickets to Your Apple Wallet: A Step-By-Step Guide
- Utilizing Technology and Finance: Adding Your SeatGeek Tickets to Your Apple Wallet
- About SeatGeek
- The Popularity of Apple Wallet
- Merging Both Platforms: The Guide
- Step-by-Step Process of Adding SeatGeek Tickets to Your Apple Wallet
- Step 1: Find Your Tickets
- Step 2: Choose the Ticket and Add to Wallet
- Step 3: Confirm
- Step 4: Verify Ticket Addition
Utilizing Technology and Finance: Adding Your SeatGeek Tickets to Your Apple Wallet
As advancements in technology and finance continue to evolve at an accelerated pace, their intersections become increasingly important to grasp. This article will delve into how to incorporate your SeatGeek tickets into your Apple Wallet, two popular platforms that are popular amongst the modern consumer.
About SeatGeek
SeatGeek has emerged as a leading platform for purchasing tickets to live events, from concerts to sporting games. The convenience it offers has made it a preferred choice for many when buying tickets for local events.
The Popularity of Apple Wallet
On the other hand, Apple Wallet has also gained vast popularity amongst users of Apple products. Offering compatibility with both credit and debit cards, it provides a straightforward way for users to manage their finances directly through their phones.
Merging Both Platforms: The Guide
This guide will explain in detail how to integrate these two services, specifically focusing on how to add SeatGeek tickets into your Apple Wallet.
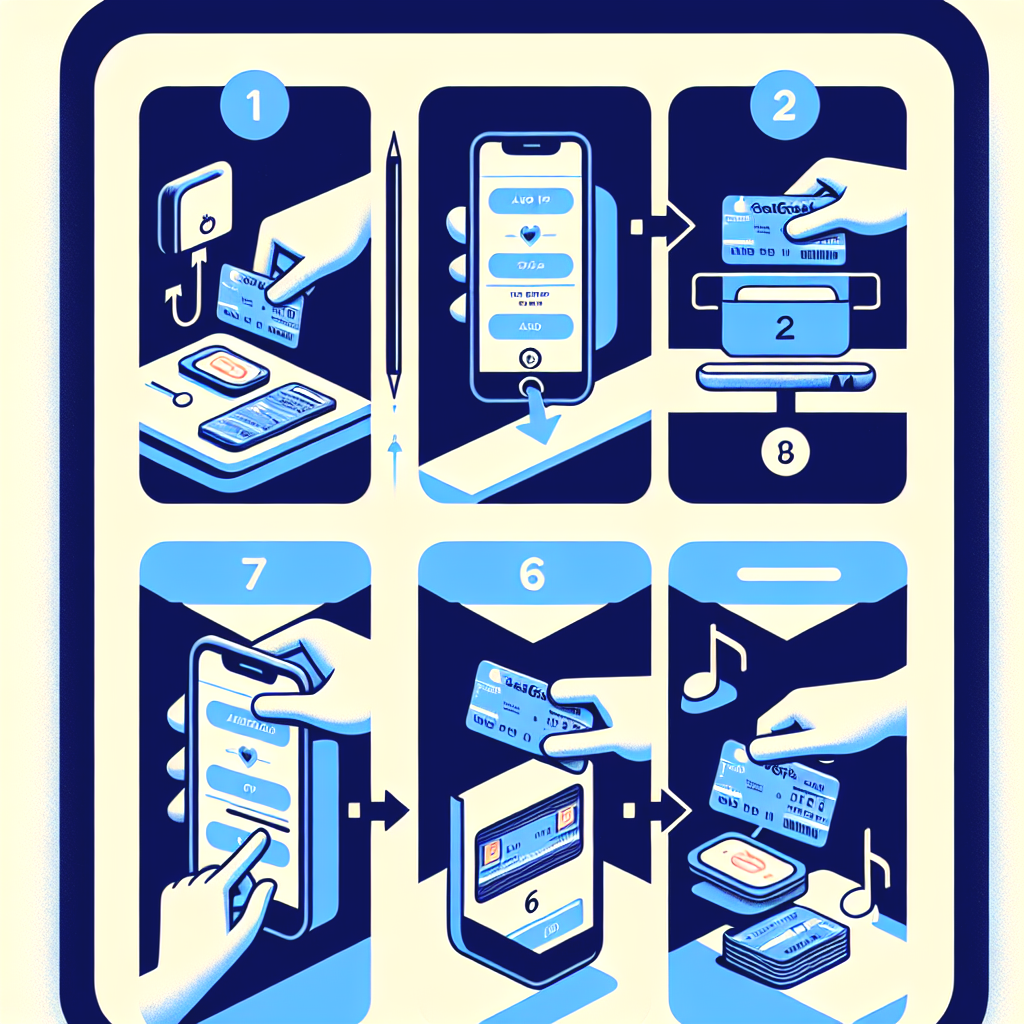
Step-by-Step Process of Adding SeatGeek Tickets to Your Apple Wallet
Fortunately, adding SeatGeek tickets to your Apple Wallet is straightforward and can be achieved in four easy steps.
Step 1: Find Your Tickets
The first step involves finding the tickets that you've previously purchased. This can be done by opening the SeatGeek app on your mobile device and navigating to the 'My Tickets' section. Here, you will see all your purchased tickets.
Step 2: Choose the Ticket and Add to Wallet
Next, select the tickets you want to add to your Apple Wallet. You should see an 'Add to Apple Wallet' option on each ticket or something similarly named. Essentially, you're looking for an option that indicates adding the ticket to a specific wallet or passport.
Step 3: Confirm
The third step involves following the on-screen instructions to confirm the addition of the tickets to your Apple Wallet. Simply select the 'confirm' option, and the process should proceed accordingly.
Step 4: Verify Ticket Addition
After following these steps, the tickets should be displayed in your Apple Wallet. However, it is crucial to confirm that the process was successful. Check your Apple Wallet via the mobile app, and if the tickets are not visible, contact SeatGeek customer support for further assistance.
How do you like the article?
Join the discussion on
You may also like